Love ’em or hate ’em, there’s a reason burpees are a mainstay in many HIIT classes — the exercise works nearly every muscle group in your bod in a single move. “When done correctly, the burpee can have incredible health benefits,” Grace Taylor, PT, DPT, previously told POPSUGAR. “They activate many muscles, including the glutes, hip flexors, quads, hamstrings, pecs, lats, and triceps.”
In its traditional form — when you jump back into a high plank, do a push-up, and then jump into a squat before finishing it all off with one more jump in place — the burpee is hardly a low-impact exercise. If you’re looking for a variation that’s easier on your joints, may we introduce you to the Pilates burpee?
With this variation, which is popular in Pilates classes, you use a reformer or sliders to slide back into a deep lunge, lower into a plank, and then say a prayer for your burning abdominal muscles. “The Pilates version of a burpee is a full-body exercise that works your arms, abs, and glutes simultaneously, and at the same time can operate as a high-intensity cardiovascular exercise depending on your speed,” says Betsy Blumenfeld, founder of Salt Pilates in San Diego.
Benefits of Pilates Burpees
There are so many things to love about a Pilates burpee (minus the fact that, you know, it burns). And while there are a lot of sensational headlines that say one exercise move can transform your whole body head to toe, do your taxes, and convince a French monarch to propose marriage to you, the Pilates burpee actually does work your entire body while building strength and providing cardio conditioning. And it does all this while being low-impact, meaning you always have at least one foot on the floor, unlike a traditional burpee. So, yeah, the hype is real!
This move helps improve balance, promote better overall mobility, and hone your strength. This is because it requires a specific and precise flow of movements, and because it’s typically done at a slow pace (read: it’s also a great way to forge a stronger mind-body connection).
How to Do a Pilates Burpee

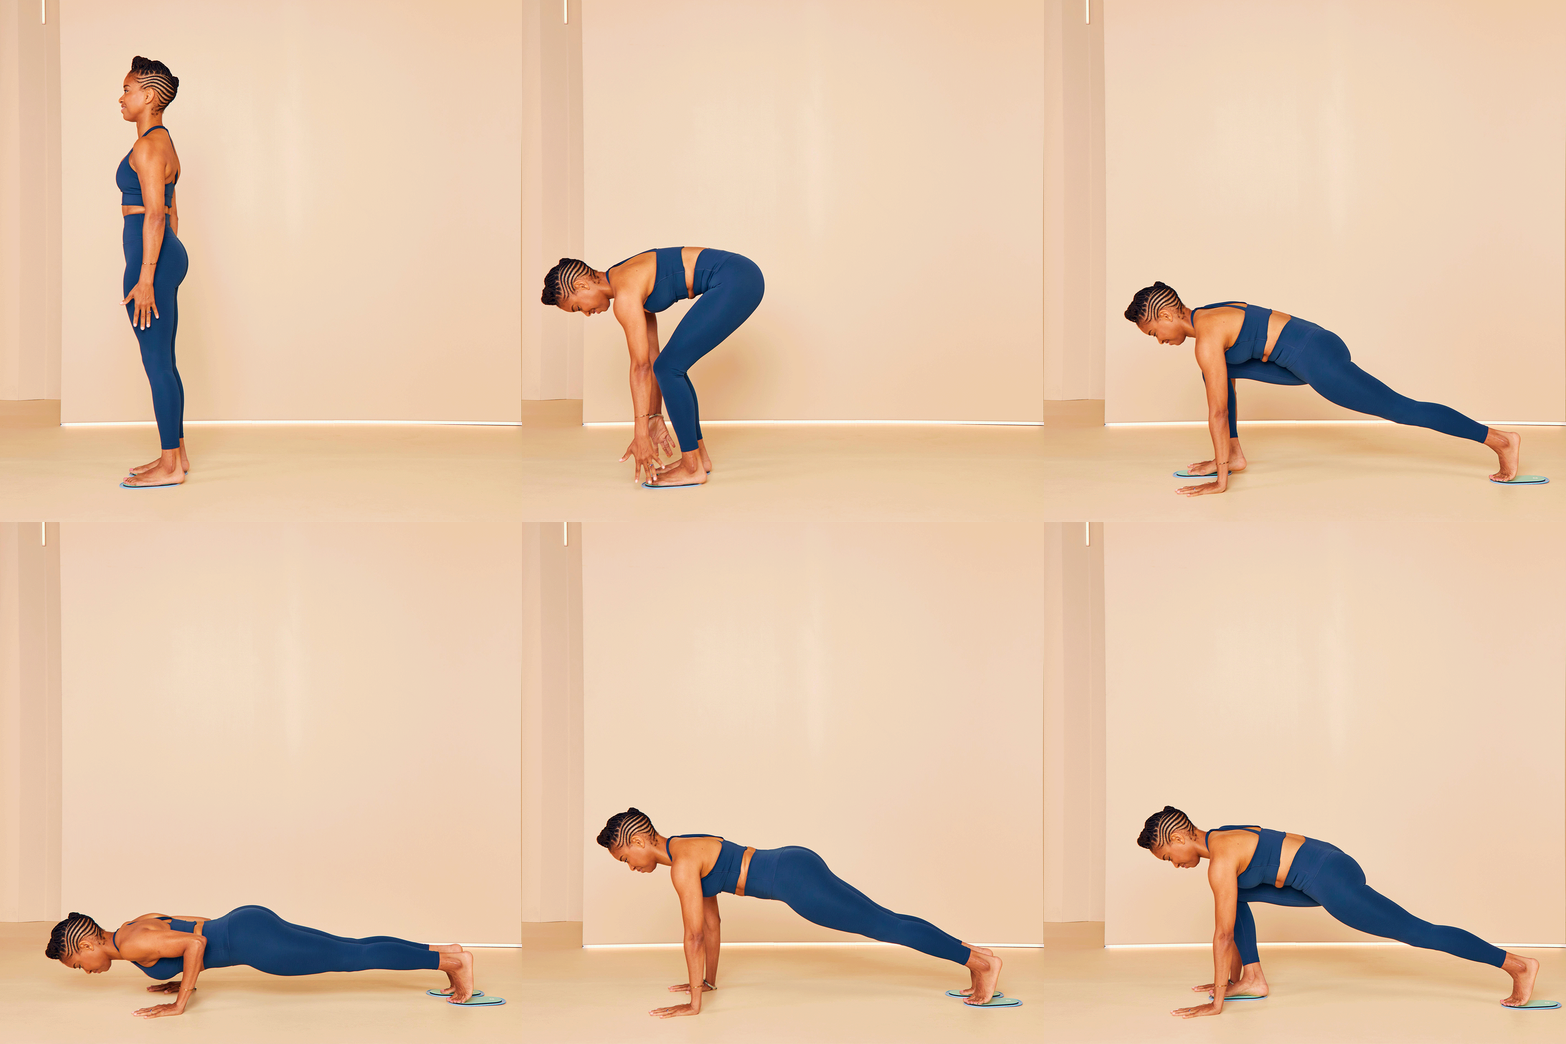
With Slider Discs or Towels
If you’re doing this without a reformer, you’ll need some slider discs, or folded washcloths or small towels, depending on what type of floor you’re on. This allows for a replicated sliding motion, like the moving carriage of a Pilates reformer.
- Start standing with your feet hip-width apart, with a slider or towel under each foot.
- Sink low into a squat, placing your hands down on the floor just in front of your feet, shoulder-width apart.
- Slide both feet backward until you’re in a high plank position, forming a straight line from shoulders to heels.
- Do a push-up, keeping your elbows close to your ribs. Keep your torso and hips steady in plank position.
- Using your core and without rounding your back, slide your feet back up to your hands so you’re in a crouch or a low squat.
- Lift your chest back up into your squat and stand tall. That’s one rep.
With Zero Equipment: Bodyweight Pilates Burpees
- With your feet wider than your hips, sink low into a squat and place your hands down onto the ground.
- Step one foot back at a time into a plank.
- Hold the plank steady, or take a triceps push-up with your elbows narrow to your ribs.
- Push back up to straight arms.
- Step one foot at a time outside of your hands, using your stomach muscles.
- Lift your chest back up into your squat and stand tall to start again.
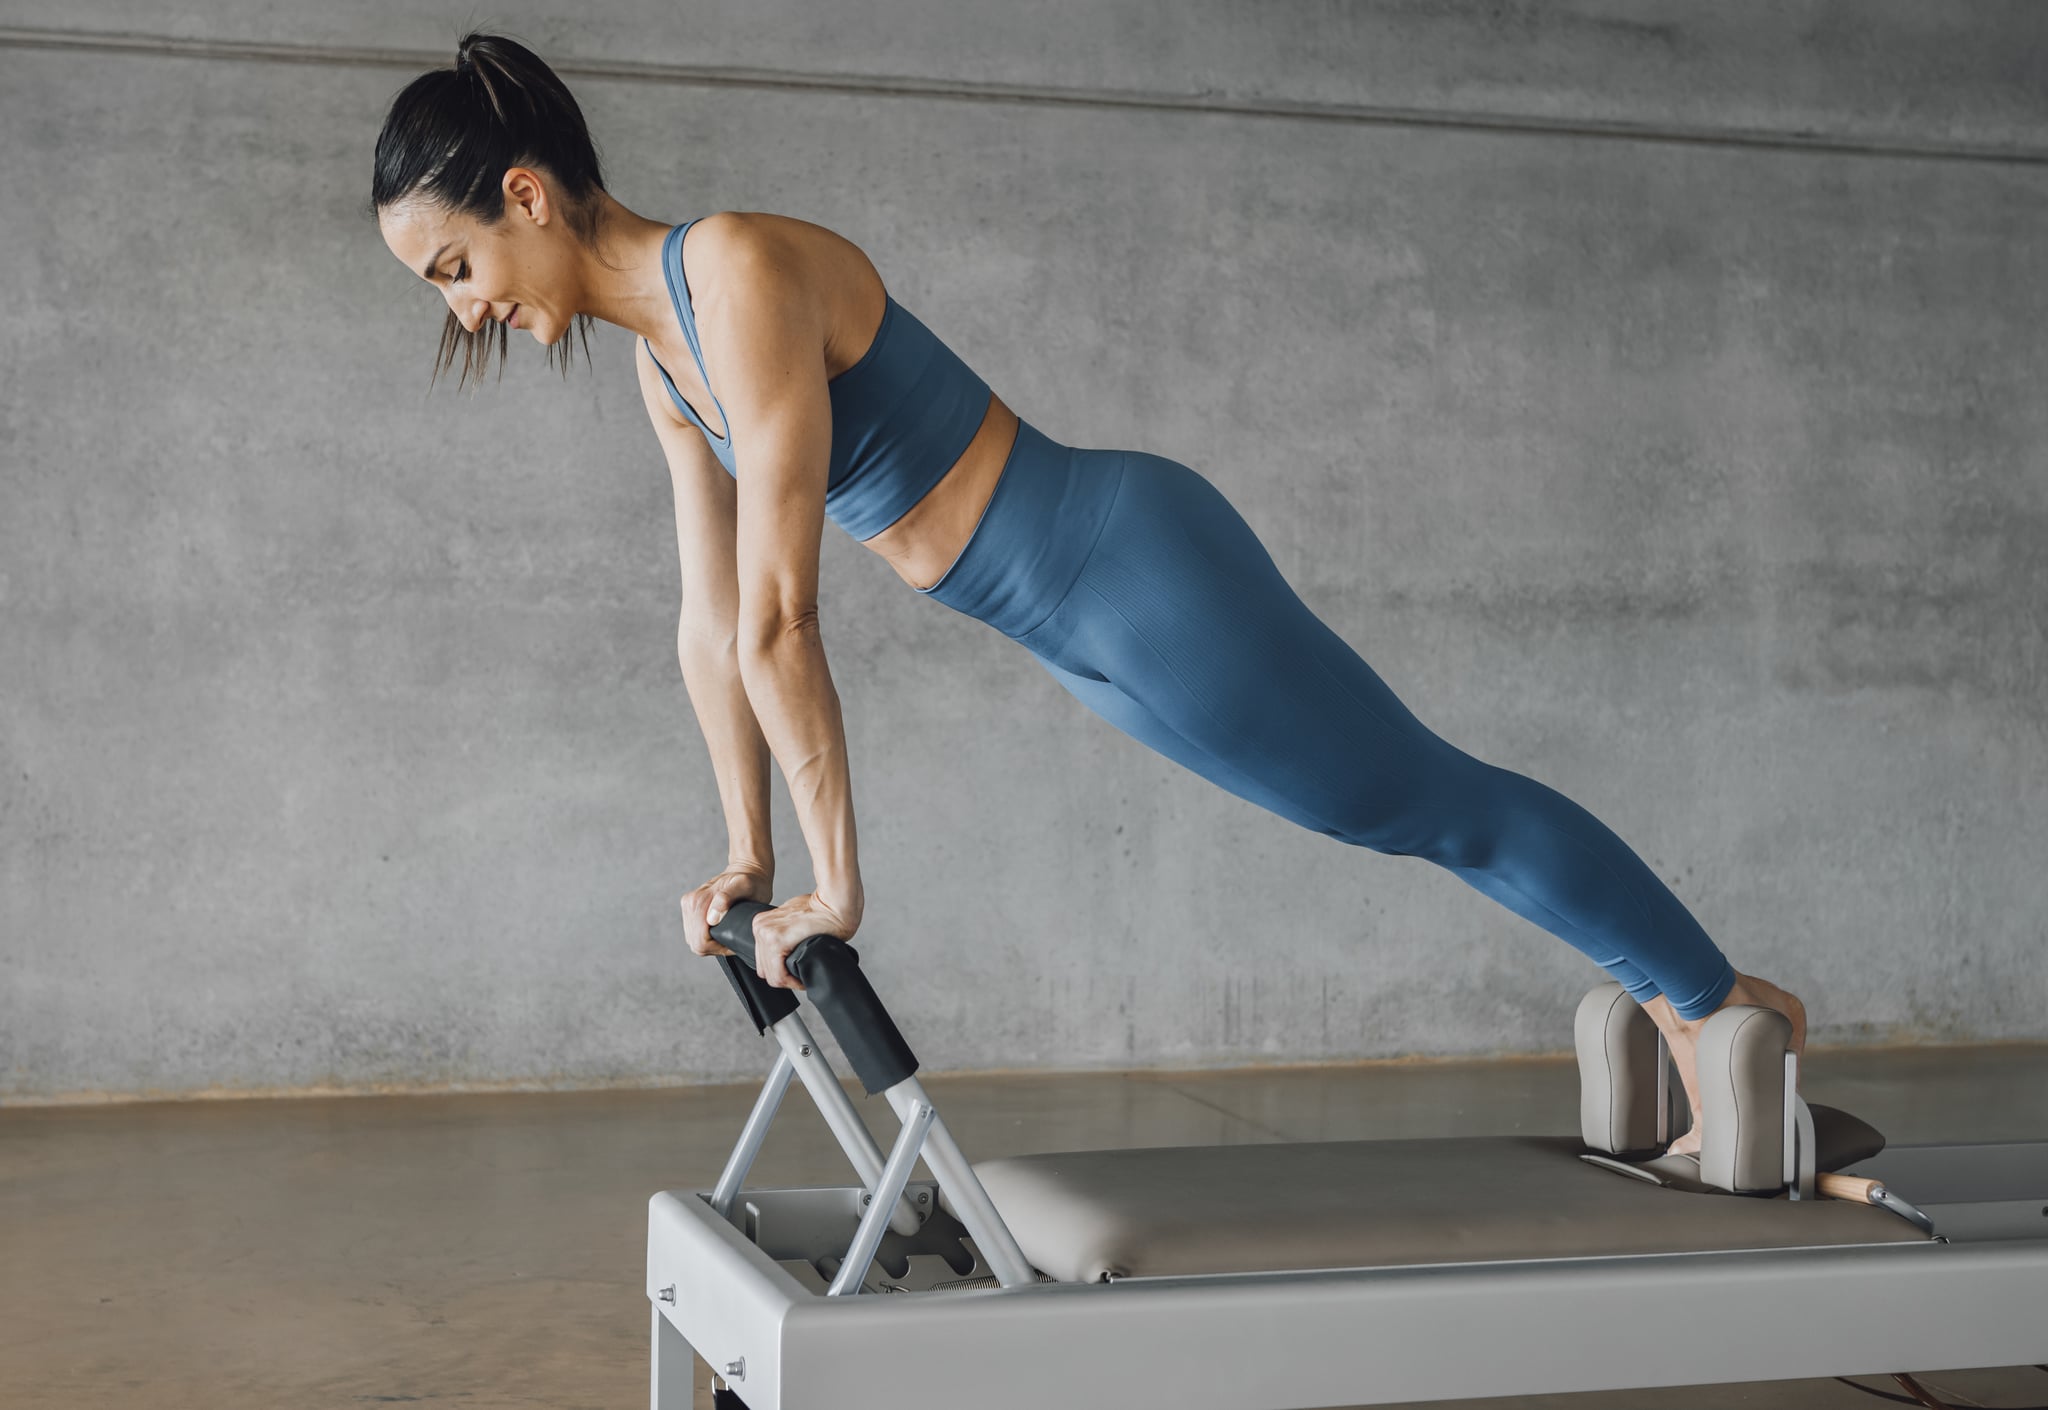
Pilates Burpee on a Reformer
The classic presentation of this exercise is on a Pilates apparatus. Blumenfeld says this move takes shape in a couple different ways on a reformer. As for your spring settings, “Start with a blue spring [moderate resistance],” she says. “Use red [lighter resistance] if you need extra assistance, or yellow [heavier resistance] if you want an extra challenge.” Below are her two iterations with equipment.
Option 1: Add the Box
If you’re in a Pilates studio with equipment, try this:
- Put the box (in short box position) against the shoulder pads.
- Find a plank with your hands on the box and your feet on the standing platform (by the springs).
- Do a push-up (a triceps push-up if you want to keep it aligned with Pilates), then bend both knees to bring the carriage back in to the stoppers.
- Transfer the weight to your heels to find a squat.
- Stand up.
- Bend back into a squat to place your hands back on the box, and push back out to your plank line to complete additional reps.
Option 2: Without the Box
Blumenfeld prefers the addition of the box on the reformer, but she says this is a suitable option if you don’t have access to one.
- With your hands on the foot bar, find a plank line with your feet against the shoulder pads of the reformer.
- Follow the same instructions as above, but when you find your squat, you will be in relevé (raised onto your “tippy toes,” or the balls of your feet) with your heels against the box or shoulder pads. So instead of standing all the way up, hold the squat (you can pulse there for added challenge or not).
- Place your hands back on the bars and press back out into a plank for additional reps.
Pilates Burpees Form Tips
Now let’s work on that form to ensure you’re performing this move safely and effectively! Blumenfeld shares her tips below:
- Feel the connection between your arms, legs, and abdominals.
- Hold your plank in a straight, long line, with your shoulders level to your hips.
- For the squat, keep your knees behind your toes, with your stomach muscles hugging in and up, away from your thighs.
- Keep your shoulders proud and away from your ears throughout the movement.
- The squeeze of your glutes throughout the plank will give you added support.
Pilates Burpee Modifications
If you’re building your strength while you nail the form, no worries (we’re right there with ya!). “Move at a slower pace and eliminate the push-up,” Blumenfeld says. Additionally, you can “do the plank portion on your knees instead of toes.” It’s better to have proper form for a safe and effective exercise — and it’s better for your body in general! Remember, Blumenthal says: “Control always wins over speed and reps.”
If you want to take things up a notch: “To make this more challenging, you can jump in and out of the plank and add a squat jump at the top of the exercise,” she says. Now get ready to feel the burn!
